Who LOVES Distress Stains!? I DO!
I'm here today to show you how to use Distress Stains and Emboss Resist to create three VERY different looks- same technique, just very different ways to use it!
Today I'm going to show you
Distress Stain Resist, Distress Stain Resist with Perfect Pearl Mist,
and Distress Stain Resist Watercoloring.
Enjoy!
Distress Stain Resist
This is the most basic of the techniques I'm going to show you today- super easy, but creates a really pretty color pattern that you can use as a main focal element on your cards or even on scrapbook layouts! I love to sit and play around with different color stains to create beautiful patterns- so much fun!
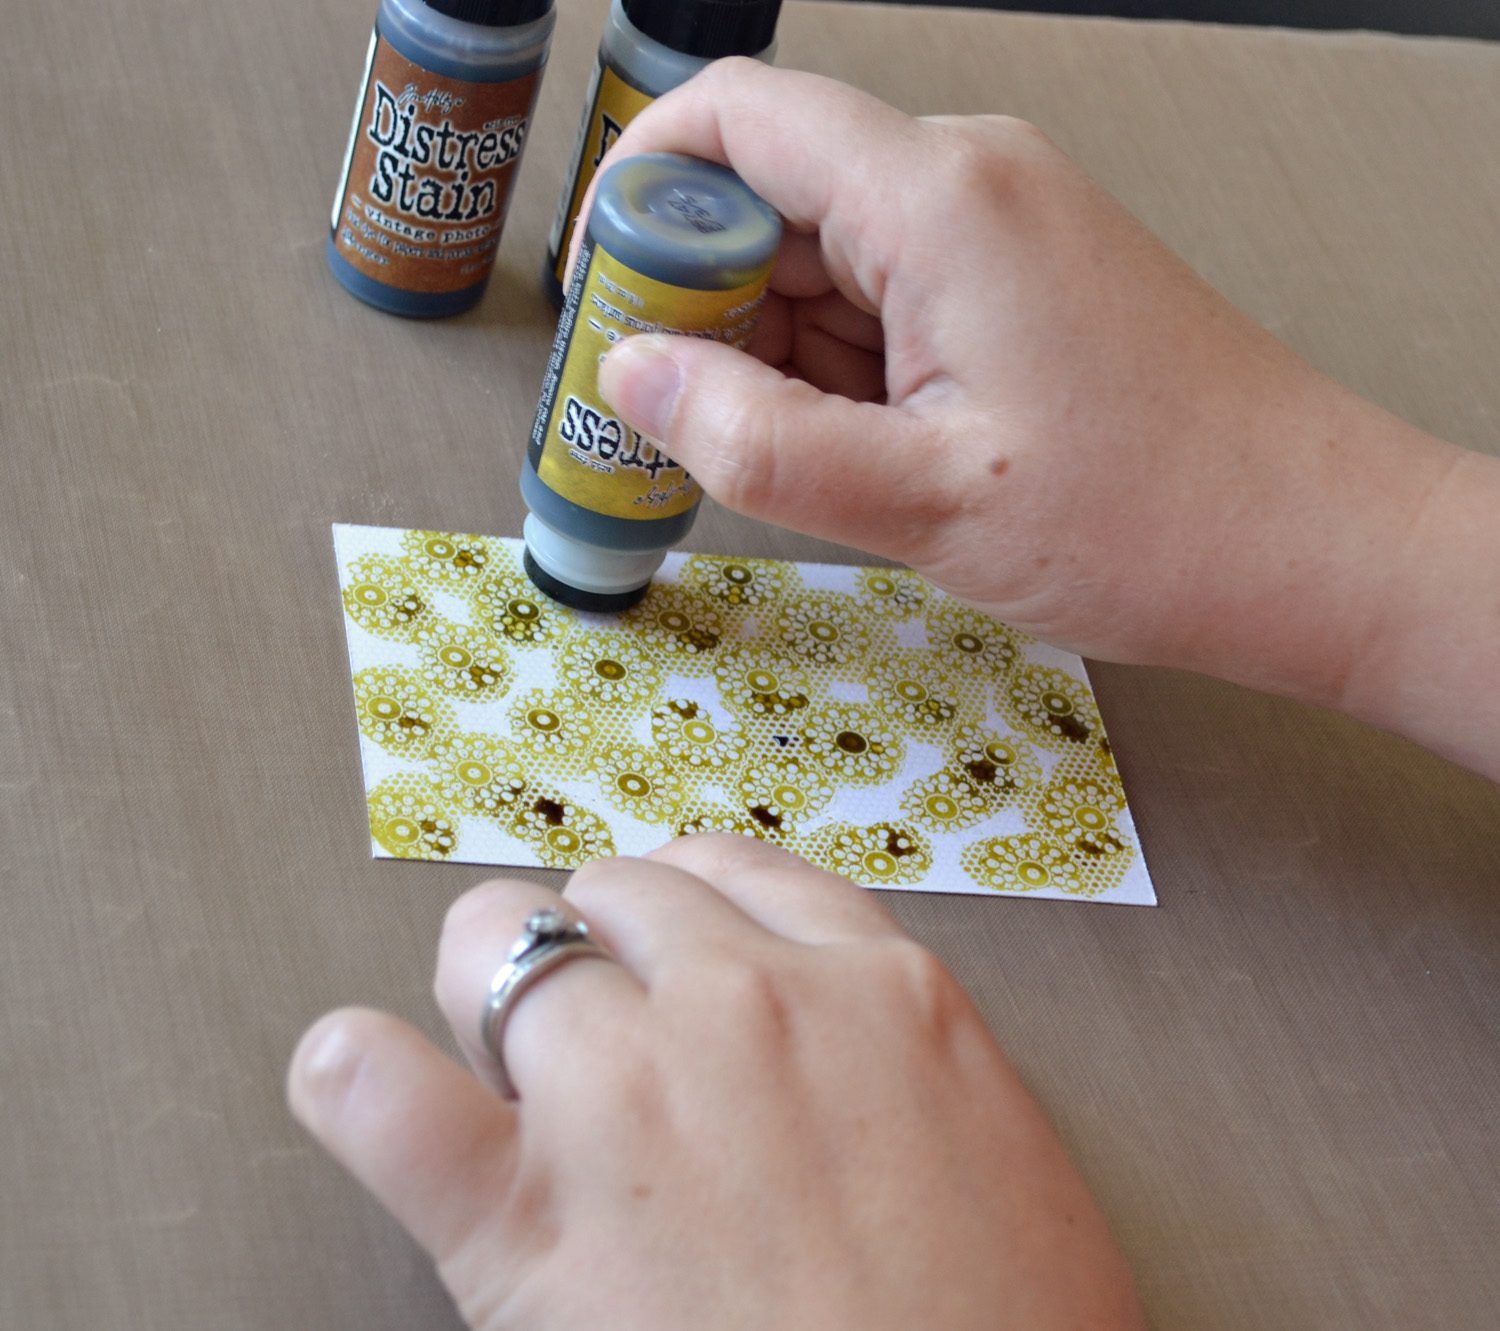
First, I started by heat embossing the Sweet Lace background with clear embossing powder on white cardstock. Then, I chose a couple different Distress Stains and went to work! The Stains I used on this card are Crushed Olive, Scattered Straw, and Vintage Photo (full list of supplies at the bottom of the post).
 |
Add color in any pattern you wish, mixing and blending the colors around until you have the look you want! I started with Crushed Olive, adding it in small circles where the circles in the background pattern are.
|
 |
Then I went in and filled the spaces with Scattered Straw. Finally, I added bits of Vintage Photo here and there to complete the look!
|
 |
| When you're finished adding your Distress Stains, you can either leave it to dry or dry it with a heat tool. |
 |
And here's the final product. If you wanted a more blended look, you could mist it with some water before heat setting!
AND... here's the card I made: |
Perfect for fall- I added the sentiment "Autumn Greetings" from the Autumn Greetings set on the inside!
Distress Stain Resist with Perfect Pearl Mist
This next technique is basically the same technique as the first, only the finished product is a sparkly, pretty blend of colors! For this one, I started by heat embossing the Zebra Print background with clear embossing powder on white cardstock. Then, I chose a couple different Distress Stains and went to work! The Stains I used on this card are Weathered Wood, Broken China, and Faded Jeans (full list of supplies at the bottom of the post).
 |
| Add color in any pattern you wish, mixing and blending the colors around until you cover the paper and have the look you want! |
 |
| Next, spray the entire sheet with Perfect Pearls Mist. Ensure that you spray enough to achieve a nice blend of the colors and get a pretty shimmer! |
 |
| Wipe the excess Perfect Pearls Mist and Stain from the embossed area with a damp towel. |
 |
Leave to dry or dry quickly with a heat tool!
And here's the card I made with this pretty, sparkly background: |
Same layout for this card, but a TOTALLY different effect! This is perfect for a fun card to send to a girlfriend! I completed it by stamping the "Celebrate" sentiment from Celebrate Cake on the inside.
Distress Stain Resist Watercoloring
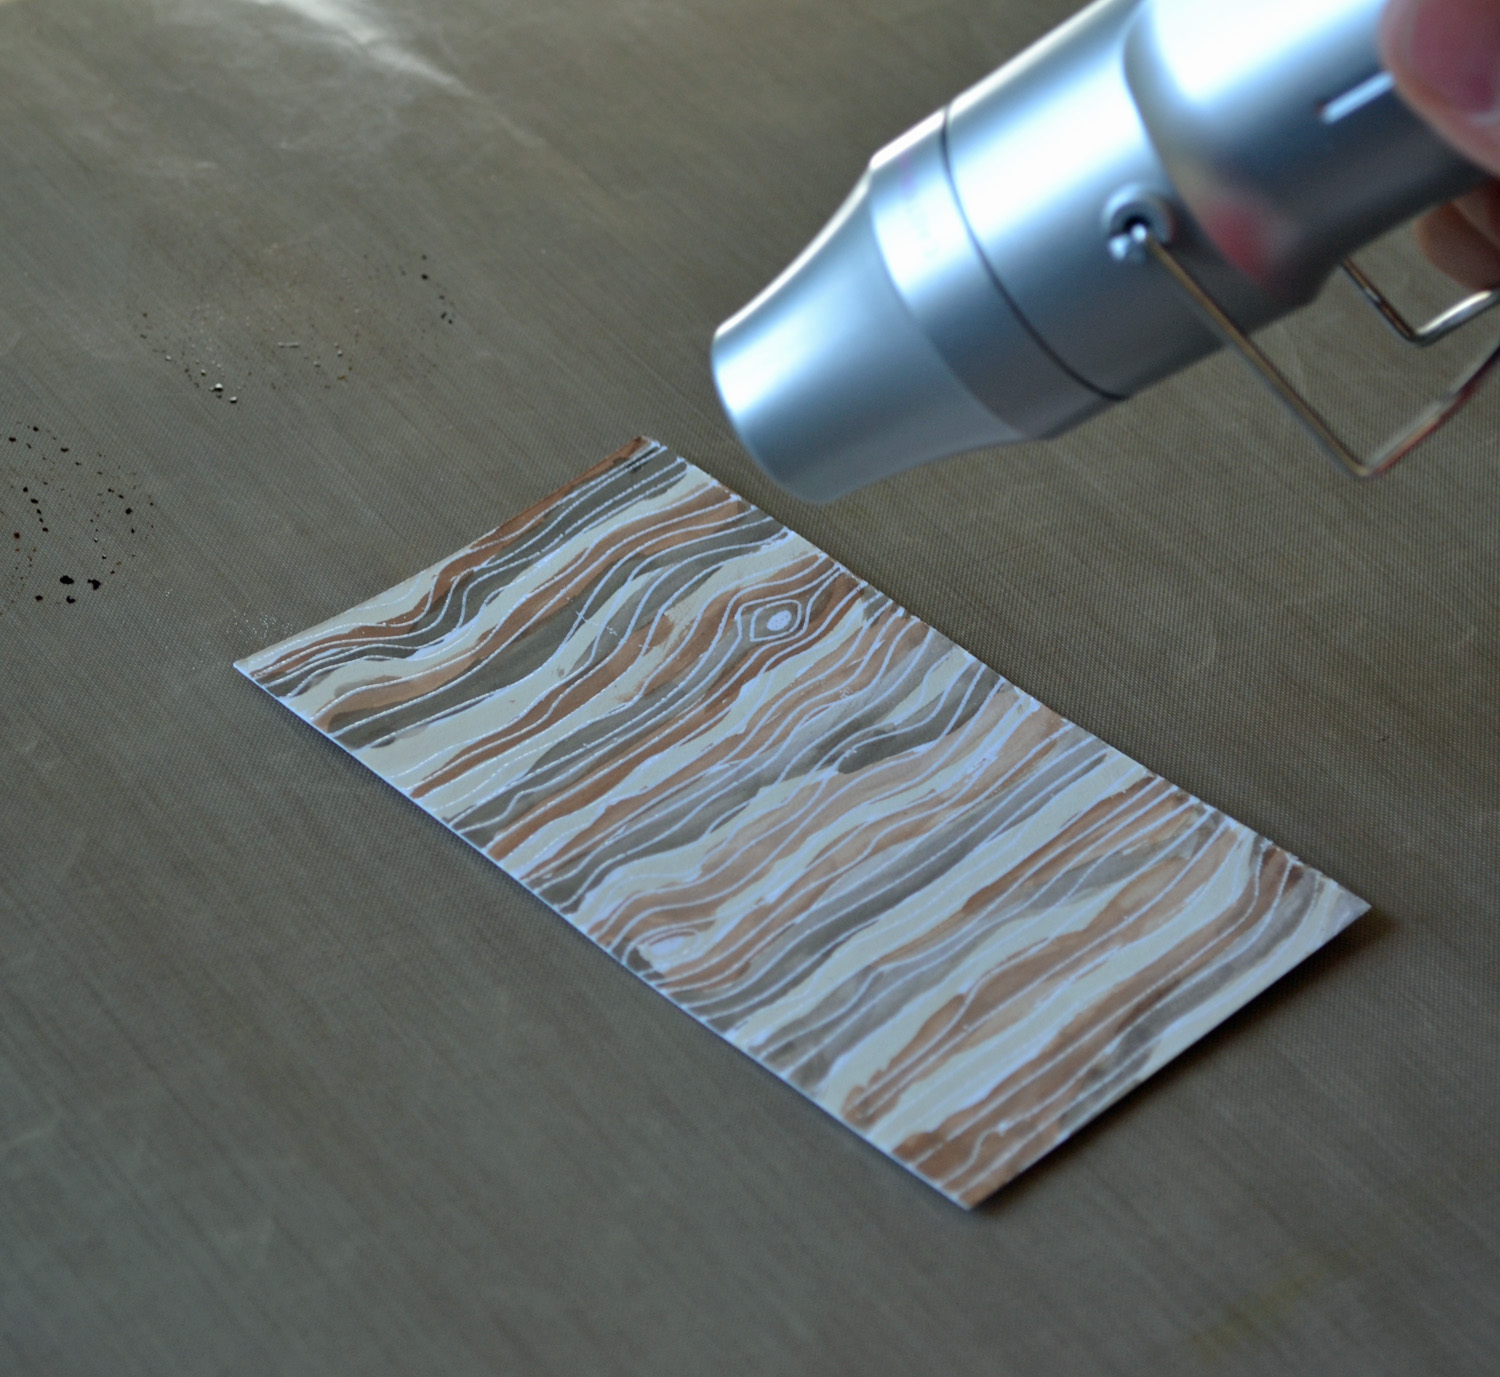
This final technique I'm going to show you is very different from the other two! For this one, I started by heat embossing the Woodgrain background with clear embossing powder on white cardstock. Then, I chose a couple different Distress Stains and watercolor painted them using my Aqua Painter! You can totally use a regular paint brush and water for this technique- I just happen to have an Aqua Painter, which makes this technique really easy. The Stains I used on this card are Antique Linen, Vintage Photo, and Walnut Stain (full list of supplies at the bottom of the post).
 |
| I started by applying some Distress Stain directly to my craft sheet in the three colors I chose to use. |
 |
| Then, I used my Aqua Painter to pick up some Stain to paint on my embossed cardstock. |
 |
| I added all three colors in stripes across the embossed paper, creating a fun, watercolored woodgrain look! I love how the stains blend together and and create this soft pattern! |
 |
Finally, either leave the paper to dry or dry it quickly with a heat tool.
|
And here's the card I made:
Same layout, just turned around a bit! LOVE this look and I'll definitely be using this technique again soon! On the inside I stamped the sentiment "Thank You" from the Hippie Chic set!
I hope I have inspired you to try Distress Stains and play around to discover new looks and styles! It is really fun to just get a little inky and play around!
{Distress Stain Resist} Supplies:

{Distress Stain Resist with Perfect Pearl Mist} Supplies:

{Distress Stain Resist Watercoloring} Supplies:


![]()


Fabulous tutorials. I love the one with Perfect Pearls mist. It really does add a lot of shimmer.
ReplyDeleteAnd big, huge congratulations on your WCMD win!
Thanks for these tutorials! I have never tried these before and I am itching to get up to my crafting spot and give them a test drive. I wanna try all three!!!
ReplyDeleteand yes, I am a distress stain addict. ;)
I tried the distress stain resist technique with just the stains themselves.Loved it! I still wanna try the other two but I'll have to do that at a different time. I linked your blog on mine so that others can take a looky at your tutorials!
ReplyDeleteHere is the link to my blog:
http://winterberry-glen.blogspot.com/2011/10/where-has-time-gone.html
ALL of these backgrounds are on my wish list and after seeing this I wish I had some extra money! Great tutorial. And I stopped by too, to send my congratulations on your WCMD win! So very happy for you!!!
ReplyDeleteCool techniques! Thanks for the step-by-step tutorials! Stumbled upon your blog from Paper Crafts. Congrats on your WCMD win!
ReplyDeleteHOLY COW!! This is an amazing post! LOOOOOOOOVE! Totally following you!!
ReplyDeleteCongrats on your win for WCMD!! I cannot wait to see your creation!!! <3
Wow, I bought a few of these stains but haven't played with them yet. SOOOO loving your ideas and examples!
ReplyDelete