Hi, everyone! I have a fun technique to show you today that I stumbled upon while playing around with my Distress Stains a little while back. I LOVE to sit down with my Distress Stains and just PLAY- you never know what you'll come up with!
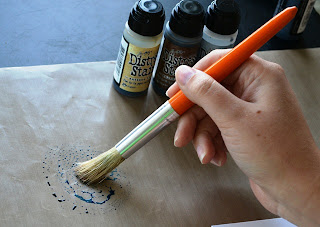
This time I decided to see what kind of effect I could get with the Distress Stains by "painting" them on cardstock with a dry, firm bristled paint brush. I literally pulled this paint brush out of the kids craft supplies- you don't need any type of special brush- use what ya got!
 Here are the supplies I used: Distress Stains (Antique Linen, Faded Jeans, Walnut Stain, and Weathered Wood), a paint brush, craft sheet, and white cardstock. First, dispense some Distress Stain right onto the craft sheet. Then, take a dry paint brush and dip it/swirl it in the Distress Stain. Softly drag the paint brush across the cardstock, creating rustic, nonuniform lines all the way across. Repeat this process with multiple colors of Distress Stain (I used 4 different colors), layering and overlapping colors until you develop a pattern you like! Have fun with it- add different colors and play around! Here is the pattern I ended up with. It's very rustic and masculine looking- just what I was looking for! Next, I inked up part of my Lost Garden background stamp with Walnut Stain Distress Ink. I only wanted the background to go across the bottom and right side, so I only inked those parts of the stamp! Stamp to create a fun layered look! After stamping! See that bottom right corner- it was screaming for a sentiment from Simple Joys- so that's what I did next! I played around a bit and decided on the sentiment combination "enjoy the journey." This card would be perfect to send to a friend starting college or starting a new job- so many possibilities! I stamped and cut out the sentiments "enjoy" and "the" to be adhered with foam dimensional tape. This really helped the sentiment to pop! Finally, I adhered the entire image panel to an A2 size card base. Here is the finished card: I hoped you enjoyed the tutorial today! Have fun with your Distress Stains- don't be afraid to play around with them a little bit! |


This is so neat - love the technique.
ReplyDeleteFabulous tutorial, Steph!!
ReplyDeleteThat looks like a great technique! Haha, of course, it makes me want to go buy Distress Stains!
ReplyDeleteI have to try this technique! I have a whole collection of distress stains that I haven't quite figured out how to use. Thanks so much for the tutorial!
ReplyDeleteLove that dry-brushing technique. And of course it just makes me wish I'd ordered Lost Garden.
ReplyDeleteWonderful technique! Thanks for sharing your talents!
ReplyDelete-Sam
Ooooh, you make me want to break out my (one) distress stain and try this!
ReplyDeleteThis is really cool! Great tutorial! That stamp is on my wish list!!
ReplyDeleteThis is gorgeous, Steph! I love what you've done with the distress stains! I just got addicted to the distress inks and now I have to invest in the stains. LOL
ReplyDeleteAwesome tutorial and card, Steph!
ReplyDeleteThis is amazing Steph! What a great idea, and I loved the colors you used along with the background stamp!!!
ReplyDeleteVery cool! I love my stains and have been playing with them alot...I will try this.
ReplyDelete